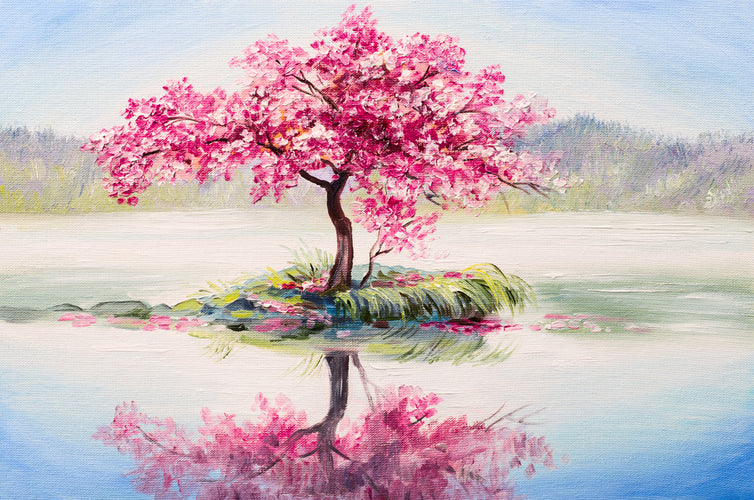
Watercolor painting follows a separate list of rules from other types of painting mediums. The pigment can be challenging to control, and technique can be hard to master.
If you visit an art gallery and look deeply at original art or art prints, you may wonder how watercolorists make such natural-looking landscapes.
Landscape art can be challenging to pull off in watercolor since they require more dimension and light. But you can become a watercolor landscape master artist with a few tips and tricks.
Use this guide to create beautiful watercolor landscape paintings successfully.
The Best Paper for Watercolor Landscapes
When painting a watercolor landscape, you need to be sure you use the right paper, or your work may be disastrous.
To hold the number of layers of washes necessary for watercolor landscapes, you will need to use a heavier-weight paper of at least 300 pounds or more.
Cold Press vs. Hot Press Paper for Watercolor Landscapes
You can use cold press paper of this weight which has more texture and absorbs more paint. This is the absolute best watercolor paper for landscapes.
The weight and absorption rate withstands the multiple washes involved in landscape paintings. As a bonus, it also adds texture that you can use to form the landscape.
Heavy-weight cold press paper can also withstand multiple paint lifts if you need to make corrections. The texture of the paper itself more readily mimics natural light by reflecting it in various directions.
Cold press paper creates softer hues that are more blendable.
But remember: the color will absorb faster, so you have less time to play around with the paint. That is why many people use multiple washes to create the right effect.
We’ll discuss this further in a minute.
Hot press paper is smoother with almost no tooth and absorbs less paint. You can still use it for watercolor painting but it’s not an ideal choice for landscapes.
Before You Paint
To prepare your paper before painting, stretch out the paper with a sponge wash and then tape it to a hard surface.
This will keep it stretched as you paint and prevent any buckling from occurring.
Using Masking Fluids
In watercolor, the bright white of the paper is the source of light in the painting. Using this light effectively is crucial to an incredible watercolor landscape.
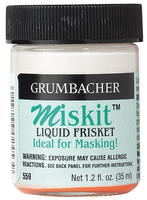
Since watercolor is challenging to control, many artists use masking fluid to reserve whites more effectively.
The term “reserving whites” refers to the method used to keep the paper free from color. This white adds dimension and contrast in the painting, most often in landscapes, natural light, or reflected light.
Masking Fluid Supplies
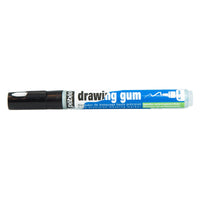
Masking fluids are usually in the form of liquid latex, but you can also find them in a pen or marker form for more precise application.
You can also opt for a beneficial kit that comes with the fluid, fluid remover, and a nib to lift it gently.
How to Use Masking Fluid
To use masking fluid in your landscapes, you will want to apply the fluid to areas of the dry paper where you want to reserve the white.
Allow the fluid to dry completely before attempting to remove it, but you will want to take it off as soon as your finished product is dry.
The longer you leave the fluid on the paper, the more challenging it will be to remove and the more likely it will damage the paper.
Sketch Out the Main Scenery
Adding a rough sketch of the composition of the painting is one of the painting techniques that many artists use, whether they’re making an oil painting or painting with acrylics.
Since watercolor is so fluid, it is wise to sketch out the main scenery of your painting before you put paintbrush to paper.
Unlike abstract watercolor paintings, landscape watercolor paintings need more definition. This sketch helps you to better stick to the composition by having clearly defined borders.
This sketch will also help you see parts of the artwork you might miss out on from the reference photo if you did not add it to your sketchbook.
You will want to use a pencil with the lightest touch so that it is easy to cover. In some instances, you might want to leave some of the lines visible for definition.
Some artists even go back over these lines with a marker. We’ll talk more about the finishing touches in the last section.
How much definition you leave all depends on the desired effect. This can be a good decision for creating paths, rugged tree trunks, and sharp rocks.
How to Build Washes for Landscapes

Building washes is a step-by-step process that watercolor artists use to build colors upon colors in fine art. Using thin layers of transparent watercolor paints, such as aquarelle, is an excellent example of building washes.
Watercolor paints are softer by nature, and adding layers of color can help brighten a particular area while leaving other sites softer.
The Sky
To create a watercolor sky, start with a light wash from the horizon line to the top of the page of the lightest blue.
If you want white reserved on the page, wash the paper with clear water and no pigment.
Clouds are an excellent example of where you would want to leave out any pigment. Wet wash these forms and then allow your color wash to fuse into the edges. You can add more definition with color to create shadow and light afterward.
Remember to take into account where the sun is and shadow and highlight accordingly.
Build up darker blues at the furthest points away from your horizon to portray sunlight.
Ultramarine blue can create a realistic, clear blue sky. If the sun in your landscape is setting, you can add purples or even a mix of reds, orange, and yellow.
Water
When creating a seascape watercolor painting, your water should always reflect the colors in the sky and the nearby landforms.
In any art instruction class or painting demonstration, instructors remind you to take the sun’s position into account. The water will look different based on how the sun is reflecting off it.
If the sun is beginning to fall behind the mountains, the water will be darker. If it is high noon, the water will create a bright reflection.
To create a sense of movement, use small, strategic brushstrokes with various values. This will mimic waves and moving water.
In nature, water is never just one color, so allow the colors to blend in the water.
Shallow water will allow what is beneath to shine through. Remember the color of rocks, sand, and greenery that are near the shore and include them in your picture.
Of course, whenever water hits a barrier, it creates a splash. Many watercolor artists use reserving whites to mimic crashing waves or even just the border of rolling waves coming ashore.
Mountains
It is crucial to use specific watercolor techniques in your painting to portray mountains as a natural part of your landscape.
Paint the mountains furthest away a lighter color, concentrating the pigment on the sharp edge of the mountain. Then, using a more washed version of that color, drag it down to fade the color into nothing.
Allow the mountain’s paint to dry completely before applying the next layer using a darker pigment. Repeat this process until you paint the closest mountain range.
Add definition of rocks or trees at the end with a smaller brush.
Trees, Bushes, and Wildflowers
When adding plants to your landscape painting, you will want to add the highlights first, followed by the midtones and shadows.
With watercolor paints, it's much harder to lighten an area than to darken it.
If you’ve followed this tutorial, then you may still see some of the outlines of trees or bushes that you left from your rough sketch of the scenery. This will help you to keep your foliage in the correct place.
Once you’re happy with the background of the trees or bushes, you can add branches, leaves, and flowers at the end.
Rocks and Cliffs
The most significant thing to include in rocks or cliffs in your watercolor landscape is shadow and light placement.
The rugged surfaces of this more rigid organic material can be difficult to mimic.
It is wise to begin each rock or cliff surface with a basic shape, then go in and add some more detail. Determine the colors of the stones by the time of day.
A rock will look darker as the sun sets, but its full bright color will show if it’s midday. If you paint an overcast day, use softer, cooler colors on the surfaces of your rocks.
How to Create Perspective With Color
Perspective is a complex effect to create in watercolor art. To add dimension to your landscape, you need an atmospheric or aerial perspective.
Let’s learn what this is and how to create this depth in your watercolor landscape.
Atmospheric Perspective
Atmospheric perspective is the atmosphere’s effect on objects seen by the naked eye at great distances. This is visible in nature, so you should mimic the result in your painting.
As objects get farther away, they will be duller in color, less saturated, and lose clarity. This form of painting is ubiquitous with Impressionism. However, it can be challenging to accomplish with watercolor paints.
This perspective is unnecessary for abstract art, but adding dimension is essential if watercolorists want to create a realistic landscape painting.
Here are the main tips for creating atmospheric perspective in your watercolor landscapes:
- Choose three or four layers of scenery to adjust the color, saturation, and detail.
- Start with the furthest layer and add very little detail; use a very light wash to add in forms with one single color.
- Add more detail and color as you fill in each proceeding layer.
- Use cooler colors for objects that are farthest away.
- Use more saturation of color the closer you want the object to appear.
A thriving landscape with realistic atmospheric perspective will allow the viewer to imagine themselves walking through your painting.
Related: Using Gouache and Watercolor Alone or Together
Laying Out the Final Details in Your Original Watercolor Painting

After you have sketched out your painting, are happy with your prominent landforms, and have successfully pulled off aerial perspective, it’s now time to add the final touches.
With your watercolor paint, a very fine brush, and a lot of pigment, add details that provide more contrast and interest to the landscape.
In many watercolor tutorials, you may notice that some watercolor artists use a pen or marker if needed for tiny details without bleeding.
You may, at this point, step back from your painting and decide that you would like to add a focal point. Some landscapes benefit by adding a boat, animal, or cottage for visual interest.
These techniques create a simple watercolor landscape.
To give yourself an extra challenge as your skills develop, create a mixed media landscape painting using watercolors, pastels, acrylic gouache, and gesso.
Watercolor landscape paintings can look almost ethereal when done right. If you use the tips and tricks above, you too can create beautiful landscapes that make your audience want to jump into the scene.
Many watercolorists choose to paint Plein air or in nature, such as at a national park or in the woods, to feel closer to their subject.
Finished watercolor landscapes are often chosen for wall art in home decor because they bring a sense of calm and beauty to the home.
Even though it can be a challenge, manipulating watercolor paints to become realistic landscapes can land your painting in homes across the country.
Learn more watercolor painting ideas in our blog, and rely on Rileystreet to provide you with all your watercolor supplies.


